How to Widgetize Your WordPress Theme in 2 Steps
Working on a new theme for the next Digging into WordPress book update, I found myself really getting into the whole “widgetizing” thing. Widgets enable non-technical users to customize your theme according to their specific layout needs, and with so many different widgets available, the possibilities are endless. You may have thought about widgets as something you do in the sidebar, but there is no reason to stop there. You can widgetize just about every part of your theme. In this post, we’ll show you how to do widgetize your theme in two easy steps. Once we get the basics down, we’ll dig into some sweet tips and tricks.
Widgetize Your WordPress Theme: Step 1
Make a fist and howl at the monitor. Then place this code into your active theme’s functions.php file:
if (function_exists('register_sidebar')) {
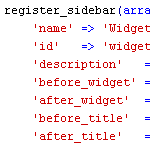
register_sidebar(array(
'name' => 'Widgetized Area',
'id' => 'widgetized-area',
'description' => 'This is a widgetized area.',
'before_widget' => '<div id="%1$s" class="widget %2$s">',
'after_widget' => '</div>',
'before_title' => '<h4>',
'after_title' => '</h4>'
));
}This is all that is needed for the first step. Once this widgetizing code is placed in your functions.php file, proceed to Step 2. The remainder of this section is explanation.
This code checks to make sure that the current version of WordPress supports widgets, and then declares an array of values that will be used to create the widgetized area in your theme. Here are the different values:
name– the name of the widgetized area as displayed in the WP Adminid– a unique identifier for your widgetized areadescription– description of the widgetized areabefore_widget– the markup generated before any user-added widgetsafter_widget– the markup generated after any user-added widgetsbefore_title– the markup generated before the title of any user-added widgetsafter_title– the markup generated after the title of any user-added widgets
So, given these parameters, our widgetizing code would result in the following output, say, if the built-in Search widget were added to our widgetized area:
<div id="search-3" class="widget widget_search">
	<h4>Search</h4>
	<form role="search" method="get" id="searchform" action="http://localhost/283/" >
		<div>
			<label class="screen-reader-text" for="s">Search for:</label>
			<input type="text" value="" name="s" id="s" />
			<input type="submit" id="searchsubmit" value="Search" />
		</div>
	</form>
</div>
Note the markup created for the opening <div>, which gets its attribute information based on the wild-card matching specified in our widgetizing array. To see this more clearly, examine the following side-by-side comparison of the sprintf directives and the resulting (X)HTML source code:
'before_widget' => '<div id="%1$s" class="widget %2$s">',
<div id="search-3" class="widget widget_search">
Hopefully the relationship is clear. This is a powerful way to ensure that all widgets have a similar class names and unique IDs, which are important for easy CSS styles.
Let’s continue with Step 2..
Widgetize Your WordPress Theme: Step 2
Finally, add the following code to the location in your theme’s template file(s) where you would like the widgetized area to appear:
<div id="widgetized-area">

	<?php if (function_exists('dynamic_sidebar') && dynamic_sidebar('widgetized-area')) : else : ?>

	<div class="pre-widget">
		<p><strong>Widgetized Area</strong></p>
		<p>This panel is active and ready for you to add some widgets via the WP Admin</p>
	</div>

	<?php endif; ?>

</div>
With both steps complete, your theme should now feature a widgetized area in the location of your choosing. Nothing else needs to be done at this point. If you get it, then get to it and continue developing your theme. For more information and some juicy tips and tricks, continue reading.
Let’s examine the code used in this second step. Everything located between the if/endif statements will be output to the browser when no widgets have been activated. This is a good place to inform the user that the area is widgetized and may be customized via the Widgets area in the WordPress Admin. I also include a “pre-widget” class to help style the pre-widget area. With multiple widgetized areas on a page, having a class name to hang styles on is super nice.
Also, note that we are using the id specified in the widgetizing array (refer to Step 1) as the parameter value for the specific dynamic_sidebar() check in the third line.
Multiple widgetized areas
So we now have a nice, widgetized sidebar. But why stop there? Implementing additional widgetized areas is as simple as replicating the code in Step 1 and Step 2. For example, let’s say we wanted to widgetize the header, sidebar, and footer areas of our theme. We would be put this in our functions.php file:
if (function_exists('register_sidebar')) {

	register_sidebar(array(
		'name' => 'Header',
		'id'   => 'header',
		'description'   => 'This is the widgetized header.',
		'before_widget' => '<div id="%1$s" class="widget %2$s">',
		'after_widget'  => '</div>',
		'before_title'  => '<h4>',
		'after_title'   => '</h4>'
	));
	register_sidebar(array(
		'name' => 'Sidebar',
		'id'   => 'sidebar',
		'description'   => 'This is the widgetized sidebar.',
		'before_widget' => '<div id="%1$s" class="widget %2$s">',
		'after_widget'  => '</div>',
		'before_title'  => '<h4>',
		'after_title'   => '</h4>'
	));
	register_sidebar(array(
		'name' => 'Footer',
		'id'   => 'footer',
		'description'   => 'This is the widgetized footer.',
		'before_widget' => '<div id="%1$s" class="widget %2$s">',
		'after_widget'  => '</div>',
		'before_title'  => '<h4>',
		'after_title'   => '</h4>'
	));

}
..and then we would place the following code chunks into their respective locations within our theme template files:
<div id="widgetized-header">

	<?php if (function_exists('dynamic_sidebar') && dynamic_sidebar('header')) : else : ?>

	<div class="pre-widget">
		<p><strong>Widgetized Header</strong></p>
		<p>This panel is active and ready for you to add some widgets via the WP Admin</p>
	</div>

	<?php endif; ?>

</div>
<div id="widgetized-sidebar">

	<?php if (function_exists('dynamic_sidebar') && dynamic_sidebar('sidebar')) : else : ?>

	<div class="pre-widget">
		<p><strong>Widgetized Sidebar</strong></p>
		<p>This panel is active and ready for you to add some widgets via the WP Admin</p>
	</div>

	<?php endif; ?>

</div>
<div id="widgetized-footer">

	<?php if (function_exists('dynamic_sidebar') && dynamic_sidebar('footer')) : else : ?>

	<div class="pre-widget">
		<p><strong>Widgetized Footer</strong></p>
		<p>This panel is active and ready for you to add some widgets via the WP Admin</p>
	</div>

	<?php endif; ?>

</div>
That’s all there is to it. Of course, you’ll probably want to tweak the details to suit your specific needs, but these two steps are all you need to widgetize your WordPress theme. Now let’s wrap things up with some juicy widgetizing tricks..
Some Juicy Widgetizing Tricks
Here are some sweet little tips for widgetizing your theme:
Streamline & organize custom widgets
The first thing that I do after widgetizing a new theme is to include a separate “widgets.php” that contains all of the custom widgets. A simple line of code is all that is required to acheive this functionality:
if ($wp_version >= 2.8) require_once(TEMPLATEPATH.'/widgets.php');
Place that code into your functions.php file and place all of your widgets into a file called widgets.php. Once in place, this method will ensure that your widgets are loaded and available for all supportive versions of WordPress. This is a great way to keep your theme files nice and organized.
Replace WordPress’ default widgets
Many of the default WordPress widgets leave something to be desired. Fortunately, it’s super-easy to override any of the default widgets with your own creations. For example, here is one way to replace the default Search Widget with your own version:
<?php function custom_search_widget() { ?>

<form action="http://localhost/283/index.php" method="get">
	<div>
		<label for="s">Site Search</label>
		<input id="s" name="s" alt="Search" type="text" />
	</div>
</form>

<?php } if (function_exists('register_sidebar_widget'))

register_sidebar_widget(__('Search'), 'custom_search_widget'); ?>
Hide unused widget areas
An empty widgetized area of your theme can look strange, especially when CSS styles are applied to the container element. To prevent this from happening, we can wrap each of our widgetized areas with the following code:
<?php if (function_exists('is_sidebar_active') && is_sidebar_active('sidebar')) { ?>

<!-- code from Step 2 or whatever you want -->

<?php } ?>
With this conditional code, widgetized areas will only be displayed if they contain at least one active widget. Nice :) Also note that this conditional technique works for displaying things other than widgets.
More..?
Hopefully this easy two-step widgetizing guide will be useful for you during your next round of theme development. As always, if you know of any other sweet widgetizing tricks, please share them in the comments!
About the author
Jeff Starr is a professional web developer and book author with over 15 years of experience. Jeff works with WordPress every day, designing themes, developing plugins, and securing sites. His books include Digging Into WordPress, WordPress Themes In Depth, and The Tao of WordPress.


24 responses
-
 Alex Denning
Widgets are the future of WordPress. In ShiftNews we more or less built the whole thing out of widgets!
Replacing default widgets isn’t the best move IMO – it’s usually because a theme doesn’t work with the widget and the theme should work with the default widgets, not just replace them!
-
 Nicolas
Great post Jeff. I’m having a little trouble to understand the real difference between having the same thing set up with multiple sidebars and widget areas. How is this really different? And if there is a big difference, when would it be better to use one or the other?
-
Nicolas
I’ve been experimenting a little on this topic for a project and think I really start to understand the real advantage of using this method. Instead of having to declare and create many different sidebars and files, all happens in a single file and you simply call the wanted area in the theme file. Thanks for this great tutorial, I will use it!
-
 Jeff Starr Post Author
Absolutely – it’s meant to keep things as simple as possible while widgetizing a theme. Another reason to love WordPress!
-
-
-
Jeff, I ran into a problem when I put the register_sidebar in the function.php file.
if ( function_exists('register_sidebar') ) {
	register_sidebar(array(
		'before_widget' => '<li id="%1$s" class="widget %2$s">',
		'after_widget' => '</li>',
		'before_title' => '<h2 class="widgettitle">',
		'after_title' => '</h2>',
	));
	register_sidebar(array('name'=>'Footer #1','before_title'=>'<h3>','after_title'=>'</h3>'));
	register_sidebar(array('name'=>'Footer #2','before_title'=>'<h3>','after_title'=>'</h3>'));
	register_sidebar(array('name'=>'Footer #3','before_title'=>'<h3>','after_title'=>'</h3>'));
	register_sidebar(array('name'=>'Footer #4','before_title'=>'<h3>','after_title'=>'</h3>'));
	register_sidebar(array('name'=>'Featured Right','before_title'=>'<span class="featured_products_title">','after_title'=>'</span>'));
}
You will see that I have the main widget area. You will also notice that I have 4 footer areas. The last area is “Featured Right”. A strange thing happened when I moved the “Featured Right” above the footers, the footer areas on the website rearranged by themselves. Is there a specific order you need to put the register_sidebar list in the function.php file? Can you think of any reason why this automatic rearranging thing might have happened?
-
Jeff Starr Post Author
No, it shouldn’t happen. You might want to triple-check that everything is referred to properly in the theme template file(s).
-
-
 Dalton
That tip about creating a widgets.php file and including it via the functions file is gold. I’ve been distributing a theme with a widget as a plugin, which required copying it over and activating it. Now I’ve rolled it into my theme directly! Thanks for that.
-
Once again a timely article. Getting ready add a second sidebar to a theme. My first try at widgetizing worked great. This time I am customizing an existing theme and something went wrong. I’m starting over tomorrow with a freshly printed set of your instructions.
-
 Paul Cunningham
Really handy article. I’ve been working on some widget areas to make a few blogs easier to customise.
-
Great article! I love digging into wordpress book and this website continues to add extra contents that is always easy to use and understand. Thanks Chris!
-
Jeff Starr Post Author
Thanks everyone for the awesome feedback — great to hear the article is useful for you! :)
-
 Rinaldi Syahran
widget area difficult to handle. The post that you make can make people more easier when they want to handle the area.Thank you.
-
 Joe Conroy
Jeff, excellent article…especially from a production and organization perspective. I am always looking to produce more in less time, AND, organize my work, so I am not going back to fix something I forgot how I did it months previously. :-) Thanks again….
-
 Jauhari
This is what I looking for… thanks for share
-
 Michael Murphy
Jeff, this was super helpful. Thank you very much! I know everybody appreciates this info and especially the thorough and easy to understand manner in which it’s presented.
-
 Garry Helman
How often do you write your blogs? I enjoy them a lot
-
Jeff Starr Post Author
Not as often as I would like, due to scheduling constraints, but hopefully this will be changing soon. Currently I try to post here at DigWP.com at least once per week, and then also at Perishable Press every week.
-
-
 Jaymie Kroese
ok but I come across this blog looking for small other things. probably means that this page has visibility for a word that actually doesn’t seem to be appropriate to the subject you are writing about here
-
Jeff Starr Post Author
Take it up with Google (or whatever search engine you used to get here)!
-
-
 Jitendra Kumar
Hi, picked up this for my theme…thanks
-
 Rachel Young
I hope I don’t sound like a total idiot here.
I have a site that requires a new header where the menu is located INSIDE the header. The header I want to put in isn’t widgetized.
Will these instructions help me widgetize the header so I can put in both the header and all the menu buttons along with it?
Thanks in advance for any help or replies!
-
 Brian
BrianAfter spending about 6 hours figuring out how to get widgets into the headers and footers with halfway tutorials, I finally find this- very clear and useful, thanks!
Now I just need to figure out how to make the widget areas look nice when in the header or footer…
-
trying to build this site and it’s hard to say in this frustrating world of amateur website develop how much of a relief it can really be to have others free of charge help you with clear and easy to understand yet needed information.
so thanks, and thanks again.
alex -
You rock!
You saved me loads of time and trouble. Many thanks.