Complete Guide to WordPress Admin Notices
As you work in the WordPress Admin Area, you’ll undoubtedly encounter “admin notices” that let you know about errors, updated settings, required actions, and so forth. Most default admin notices are provided by WordPress out of the box, but it’s up to plugins and themes to provide any custom notices that may be required. This DigWP tutorial digs deep into WordPress admin notices and explains how to implement, customize, and everything in between.
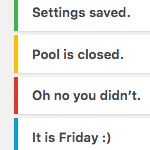
Four types of admin notices
Here are screenshots showing examples of the four types of admin notices:
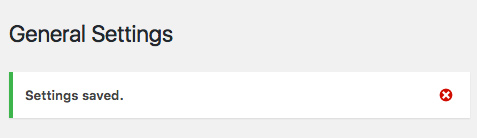
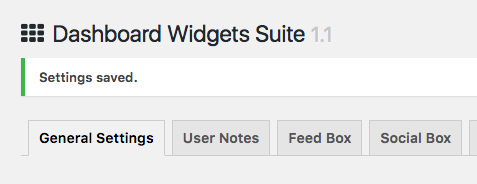 Success – displayed when something good happens, like settings updated successfully
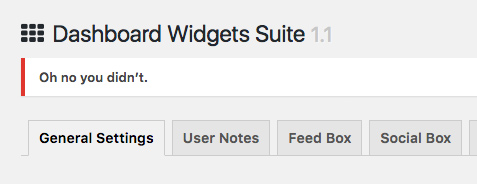 Error – displayed when an error or something bad happens
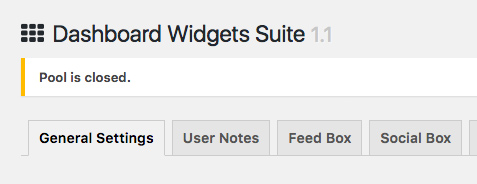 Warning – displayed when the user should be warned of something
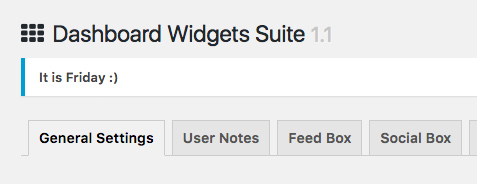 Information – displayed to communicate information to the user
Probably everyone is familiar with these notices, they help provide feedback to the user as they work with the WP Admin Area. The remainder of this article is aimed at WordPress developers who implement these notices in their plugins and themes.
Under the hood
The source code of these different types of admin notices basically is the same. The only difference are the class names and the message. For example, here is the default markup generated by WordPress when displaying a typical “Success” notice:
<div class="notice notice-success is-dismissible">
	<p><strong>Settings saved.</strong></p>
	<button type="button" class="notice-dismiss">
		<span class="screen-reader-text">Dismiss this notice.</span>
	</button>
</div>
Other notices are similar in structure, but may include different classes, such as settings-error, which WordPress automatically includes on admin notices that are displayed on Settings pages (i.e., admin pages located under the WP Settings menu). Some admin pages also include an id attribute on admin notices. For example, admin notices displayed on Settings pages include the following id:
id="setting-error-settings_updated"
Fortunately, we don’t need to worry about the id attributes and extra classes that WordPress automatically adds to admin notices. When adding our own custom admin notices, only a minimal amount of markup is required:
<div class="notice notice-success is-dismissible">
	<p><strong>Settings saved.</strong></p>
</div>
Using that basic pattern, we can create any type of admin notice by simply changing the class names and the message itself. Everything else remains the same and/or is handled automagically by WordPress.
Class dismissed
In the example markup provided in the previous section, notice the class, is-dismissible included in the outer <div> element. This class is what makes the admin notice “dismissible”, so that users can click a small “x” button to remove the message. This helps to streamline productivity and save time. When an admin notice is not dismissible, the only way to remove it is to revisit the page.
 Dismissed! Click the “x” to close any dismissible admin notice without revisiting the page
When the is-dismissible class is included, WordPress automically adds the markup used to display the “x” (dismiss) button. So adding a class is all that is required to make any admin notice dismissible. To illustrate with actual code, adding is-dismissible turns this:
<div class="notice notice-success is-dismissible">
	<p><strong>Settings saved.</strong></p>
</div>
..into this:
<div class="notice notice-success is-dismissible">
	<p><strong>Settings saved.</strong></p>
	<button type="button" class="notice-dismiss">
		<span class="screen-reader-text">Dismiss this notice.</span>
	</button>
</div>
Note that WordPress also provides the CSS required to style the notice and the JavaScript required to make it all work. To check out the CSS and JavaScript, visit the WP General Settings, click the “Save Changes” button, and inspect the notice using your favorite browser (e.g., Chrome or Firefox).
Types of notices
As shown in the screenshots above, there are four types of notices:
notice-error– error message displayed with a red bordernotice-warning– warning message displayed with a yellow bordernotice-success– success message displayed with a green bordernotice-info– info message displayed with a blue border
Here are some examples to give you a better idea:
<div class="notice notice-error is-dismissible">
    <p>There has been an error.</p>
</div>

<div class="notice notice-warning is-dismissible">
    <p>This is a warning message.</p>
</div>

<div class="notice notice-success is-dismissible">
    <p>This is a success message.</p>
</div>

<div class="notice notice-info is-dismissible">
    <p>This is some information.</p>
</div>
In your WordPress travels, instead of the previous four recommended classes, you may encounter the following:
updated– displays message with a green bordererror– displays message with a red borderupdate-nag– displays message with a yellow border
These are relics from previous versions of WordPress and should NOT be used for admin notices. Yes they still work, sort of, but they should be considered deprecated in favor of the four classes described above.
Adding default admin notices
For settings pages located in the Settings Menu, WordPress automatically displays “error” and “updated” messages. So if the settings page for your plugin or theme is located under the Settings Menu, default admin notices are handled automatically by WordPress. For example, in the following screenshot we see that my plugin Dashboard Widgets Suite is located under the Settings Menu, so WordPress takes care of the plugin’s default admin notices.
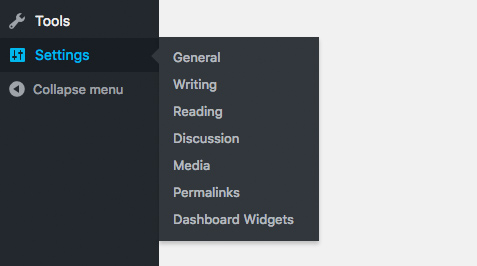 The one and only, WordPress Settings Menu
For settings pages that are located in any other location, default admin notices are NOT displayed automatically. So if your plugin or theme page is located in its own menu, or in a submenu of any menu other than Settings, WordPress does not automatically display default admin notices. In such case, you need to invoke settings_errors() to display the default “error” and “updated” messages. Here are two ways to make it happen.
Method 1
The quickest method is to add settings_errors() explicitly to your displayed settings, for example:
<div class="wrap">
	<h1>My Plugin Title</h1>

	<?php settings_errors(); ?>

	<form method="post" action="options.php">

		.
		.
		.

	</form>
</div>
With that in place, you’re all set. WordPress will display default admin notices when settings are updated successfully or when there is an error.
Method 2
A cleaner method is to add settings_errors() via admin_notices hook, for example:
// display default admin notice
function shapeSpace_add_settings_errors() {

    settings_errors();

}
add_action('admin_notices', 'shapeSpace_add_settings_errors');
This accomplishes the same thing as the previous method, as WordPress runs admin_notices automatically and displays the results beneath the page’s <h1> tag. This method is recommend because it is more flexible/extensible.
Incidentally, have you ever encountered a situation where a settings page is diplaying duplicate admin notices? If so, most likely it is because the settings page is located under the Settings menu AND settings_errors() is included in the plugin code. So you get the notice displayed automatically by WordPress and also the notice displayed by settings_errors(). So to resolve this issue, remove the explicit call to settings_errors() and call it a day.
Adding custom admin notices
So far we’ve seen how to implement default admin notices, but what if we want to add our own custom notices? Well I’m glad you asked, because that’s what this section is all about. As with most everything with WordPress, there are multiple ways of doing things. And adding custom admin notices is no exception.
To add custom admin notices, you can either hook into admin_notices or use add_settings_error(). Let’s look at example of each of these methods.
Method 1: admin_notices hook
The most straightforward way to display custom admin notices is to create a function and hook it into admin_notices, for example:
// display custom admin notice
function shapeSpace_custom_admin_notice() { ?>

	<div class="notice notice-success is-dismissible">
		<p><?php _e('Congratulations, you did it!', 'shapeSpace'); ?></p>
	</div>

<?php }
add_action('admin_notices', 'shapeSpace_custom_admin_notice');
Here, “shapeSpace” is the name of my example plugin or theme, so we use it as the text-domain value of _e(), and also as the prefix of the function name. The function itself outputs our custom admin notice, which is hooked into admin_notices to be displayed by WordPress. And remember, we can change the appearance of the notice by using whichever class makes sense (i.e., notice-error, notice-warning, notice-success, or notice-info).
Real-world example
This method of adding notices is very flexible, enabling you to hook up custom messages just about anytime, anywhere. For example, my bad bots plugin provides an option for the user to restore the plugin’s default settings. So when the user clicks the “restore settings” button, the following events happen:
- The settings form is submitted
- A function attempts to restore the default settings
- If the settings are restored successfully,
reset-options=trueis passed via GET parameter - Or, if the settings are not restored successfully,
reset-options=falseis passed via GET parameter - The following function checks the value of
reset-optionsand displays the appropriate admin notice
// display custom admin notice
function blackhole_tools_admin_notice() {

	$screen = get_current_screen();

	if ($screen->id === 'toplevel_page_blackhole_settings') {

		if (isset($_GET['reset-options'])) {

			if ($_GET['reset-options'] === 'true') : ?>

				<div class="notice notice-success is-dismissible">
					<p><?php _e('Default settings restored.', 'bbb'); ?></p>
				</div>

			<?php else : ?>

				<div class="notice notice-error is-dismissible">
					<p><?php _e('No changes made.', 'bbb'); ?></p>
				</div>

			<?php endif;

		}
	}
}
add_action('admin_notices', 'blackhole_tools_admin_notice');
This function checks the current screen and the GET variable, and then displays the appropriate admin notice, depending on whether or not the default settings were restored successfully. This example illustrates the sheer utility of the admin_notices hook, which can be used to display virtually any custom admin notice to the user.
Method 2: add_settings_error()
Another prescribed method for displaying custom admin notices is to use add_settings_error(), which can be used directly in your settings validation function. So for example, let’s say that our plugin registers the following setting:
// register_setting( $option_group, $option_name, $sanitize_callback );
register_setting('my_option_group', 'my_option_group', 'my_option_group_validate');
Notice that this setting calls my_option_group_validate as the $sanitize_callback parameter. So let’s say that my_option_group_validate looks like this:
// my $sanitize_callback function
function my_option_group_validate($input) {

	if (null != $input) {

		if (false === get_option('my_option')) {

			add_option('my_option', $input);

		} else {

			update_option('my_option', $input);

		}

	}

	return $input;

}
This validation function checks/sanitizes as needed all of the input for the my_option_group setting. This is standard stuff; registering a setting with a validation callback function is a technique used by many WordPress plugins.
Now with this code in place, let’s say that we want to display a custom admin notice based on whether or not a specific setting meets certain criteria. So instead of displaying the default “Settings saved” notice, which applies to the entire group of settings, we want to display a notice that applies to a specific setting. This is where add_settings_error() comes into play. We can display the custom error by including add_settings_error() in our validation function, for example:
// my $sanitize_callback function
function my_option_group_validate($input) {

	message = null;
	$type = null;

	if (null != $input) {

		if (false === get_option('my_option')) {

			add_option('my_option', $input);
			$message = __('Option added! Congrats man.');
			$type = 'updated';

		} else {

			update_option('my_option', $input);
			$message = __('Option updated! Miller time.');
			$type = 'updated';

		}

	} else {

		$message = __('Oh noes! There was a problem.');
		$type = 'error';

	}

	// add_settings_error( $setting, $code, $message, $type )
	add_settings_error('my_option_notice', 'my_option_notice', $message, $type);

	return $input;

}
Here we have fleshed out our original validation function with some conditional code. The code now keeps track of $message and $type variables, which can be used by add_settings_error() to display a custom notice based on what happened with my_option. This technique is useful because it gives us granular control over specific settings errors, and thereby enables us to display precise information to the user. And it’s extra nice because there are no hooks required to implement. Simply include add_settings_error() in the validation callback, and WordPress automatically displays the appropriate notice.
Bonus! Method 3: Quick fix
While either of the previous methods are considered best-practice, they may not be feasible or practical in all scenarios. So to help anyone out who may be in a pinch to get things done, here is a third, alternate method that can be used to quickly add custom admin notices just about anywhere. Here is the magic bullet:
<?php if (isset($_GET['settings-updated'])) : ?>
	<div class="notice notice-success is-dismissible"><p><?php _e('Something happened!'); ?>.</p></div>
<?php endif; ?>
This code snippet grabs the global $_GET variable, checks if settings-updated is set, and then displays the basic markup required to display an admin notice.
The key to making this work is checking the relevant variable and including the classes required to display whichever type of notice is required.
Again, this technique is meant as a “quick fix” for tight spots. It is much better to use one of the prescribed techniques above for adding your admin notices.
Wrap up
This article attempts to cover all possible cases for adding admin notices. If anything is missing, please leave a comment or drop a line.
As always, thanks for reading :)
References & more infos
To learn more about the code and techniques presented in this tutorial, check out the following resources at the WordPress Codex.
About the author
Jeff Starr is a professional web developer and book author with over 15 years of experience. Jeff works with WordPress every day, designing themes, developing plugins, and securing sites. His books include Digging Into WordPress, WordPress Themes In Depth, and The Tao of WordPress.