Integrating Fading Button Navigation
I was talking with Darren Hoyt recently about building a better interactive button1. The goal of the button was to provide three states: regular, hover, and active (pressed). That is standard of any good button, but we were going to integrate some fading effects into it to really making the button satisfying to interact with. Here is a demo, and in this tutorial we’ll show you how to integrate it into WordPress.
I’ve said (loudly) before, that yes, this will work with WordPress. I wasn’t referring to anything in particular, but just any old technique. WordPress doesn’t care what you use within it. Any ol’ jQuery plugin you can find will work just fine. This time, I’m going to walk through the process. It will be specific to this technique, but this series of steps can be applied to incorporating just about any other JavaScript “thingy” you find and want to use on the web.
What do we have here?
Here are the components we’ll be using for this tutorial:
- Markup – some HTML that needs to be in place for the menu to work.
- CSS – some CSS in place that the markup needs
- Images – where should they go?
- jQuery dependency – this technique is going to rely on jQuery, so we need to ensure that is available
- jQuery plugin – we need this plugin loaded for our buttons to use
- Script – we have our own JavaScript we need to run
We’d better just take this bit by bit.
1. Markup
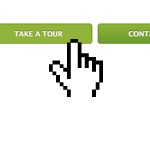
Like any good semantic navigation markup, we’re shooting for markup like this:
<ul id="nav">
   <li><a href="#">Take a Tour</a></li>
   <li><a href="#">Contact Us</a></li>
</ul>
That is hard-coded though, and that’s no good. With WordPress, we can have this navigation be dynamic easily, by using a built-in WordPress function to create it instead. Assuming this navigation is going to be a list of pages, we’ll use the appropriate function:
<ul id="nav">
   <?php wp_list_pages("title_li=");
</ul>
This function can be customized a ton, so check the Codex if you need to add pages, exclude pages, only go one level deep, etc.
2. CSS
We have some CSS that makes this menu look the way it does:
#nav {
    list-style: none;
}

#nav li  {
    display: inline;
}

#nav li a {
	display: block;
	padding: 10px 0;
	text-decoration: none;
	width: 200px;
	text-align: center;
	text-shadow: 0 -1px 0 rgba(0, 0, 0, 0.8);
	font-weight: bold;
	text-transform: uppercase;
	color: #FFF;
	font: bold .8em 'Lucida Grande',Arial;
	background:	#90b339 url(../images/button-bg.png) 0 -183px repeat-x;
	-moz-border-radius: 5px;
 	-webkit-border-radius: 5px;
 	border: 1px solid #608925;
	float: left;
	margin: 0 10px 10px 0;
}
Now we need to consider where this CSS is needed. Is this going to be shown on every page of the site? If yes, then it should go into the main CSS that your theme already uses. Loading an additional CSS file just for this is probably overkill. If this is special navigation only being used on one (or very few) pages on the site, then you probably should not put it in the main stylesheet, but leave it seperate and load that CSS file with conditional tags in your header.
3. Images
We need images for our button. Obviously in WordPress we have “themes”. Navigation is definitely a part of a theme, so the images belong there. If you are blogging, and you use photos in your articles, I’d argue those images don’t belong in your theme images folder but in an images folder in the root. Those aren’t dependent on the current theme of your blog, whereas something like navigation is.
There is probably already an images folder in your theme folder, so put the images in there. If not, make one and put them in that. In the previous step, we referenced a background image on our anchor links. Notice the URL began with “../”. That is the relative path from the CSS file to the image file. If the CSS for your theme is also in a subdirectory in your theme (e.g. a “css” folder), then starting with the dot-dot-slash to back up one directory first makes sense. If your CSS is laying straight in your theme folder, just start the reference to that image with “images/”.
In this demo, we use a single image with a gradient. This is an efficient way to go about the technique, as all we do is shift the image up and down to accomplish the different states of the button.
 CSS background image
4. jQuery Dependency
All we need to do here is make sure that jQuery is loaded. Do not hard-code a new direct link to jQuery. As the article linked to above goes into, you need to let WordPress know you are using a JavaScript library so that other stuff that also intends to use it doesn’t go and load their own copy too and cause conflicts. In short: do this before your wp_head(); hook:
<?php wp_enqueue_script("jquery"); ?>5. jQuery Plugin
Now we need to link up a plugin file that isn’t bundled with WordPress. Technically you can use wp_enqueue_script here as well, but the benefits to doing so this time are pretty minimal since no naming convention exists for every obscure plugin out there. In this case, just toss the plugin file in a “js” folder inside your theme and link it up like this:
<script type='text/javascript' src='<?php bloginfo('stylesheet_directory'); ?>/js/plugin.js'></script>In our case, we’ll be using the background position plugin for jQuery to accomplish part of the effect.
6. Custom Script
Now we are in a position just like we were with the CSS. Is there some script file that is already running on every page of the site? And is this menu going to be running on every page of the site? If yes, then you can drop the JavaScript into that file, to keep things clean and not load up another file. If there isn’t any JavaScript yet, you can link up your script just like we loaded the plugin:
<script type='text/javascript' src='<?php bloginfo('stylesheet_directory'); ?>/js/script.js'></script>For our button, we are doing some pretty simple stuff. We are going to shift the background position of the gradient image a bit, to give it a subtle rollover effect. Then we’ll use the mousedown event to simulate the “active” state:
$(function(){

	$("#nav li a")
		.hover(function(){
			$(this).animate({
				backgroundPosition: "0 -140px"
			}, 100)
		}, function() {
			$(this).animate({
				backgroundPosition: "0 -183px"
			}, 100)
		})
		.mousedown(function(){
			$(this).css({
				backgroundPosition: "0 -220px"
			})
		});

});
We Made It!
So that covers the theory of installing an already-existing demo into a WordPress site. In short, you need to break apart what is provided and figure out the best place to put or recreate all the parts in the smartest way.
1 Editor’s note: 404 link removed.
About the author
Chris Coyier is a real-world web designer who has been reaching for WordPress to power client sites for many years. He subscribes to the theory that not only is WordPress capable of powering any website it is almost always the right choice. His other projects include CodePen and Quotes on Design.
19 responses
-
Hey guys, nice exemple but am wondering why you use javascript for something that works with just css ?
I did a quick test with wp and those lines:
#menu li a { your css codes }
#menu li a:hover {background:#90b339 url(images/button-bg.png) 0 -150px repeat-x;}
#menu li a:active {background-color: rgb(108,157,44); background-image:none;}Works just fine.
-
 Chris Coyier Post Author
Yep, that would work… but the goal is to have kinda of a fading/shifting thing going on. The rollover actually animates the gradient downwards creating kind of a unique effect.
It goes pretty fast though, in order to feel responsive rather than sluggish. In fact, the active state could have an animation too, but that is a case where a button really need to be quick to react to “feel right”.
-
It should use CSS for the hover-effect if Javascript is turned off. That way you don’t limit your users.
-
-
-
humm didnt see the animation with chrome. I got it with all other browsers but not chrome, weird, really a on off interaction whereas opera, ie, safari and ff give me kinda fadein/out. That might be the answer to my question above : )
-
Just saw your reply, yeah was the answer.
-
-
Can’t this be done in CSS3?
-
Chris Coyier Post Author
Some of it, yeah. Like the gradient, and we could do opacity fades that get pretty close, but not entirely. JavaScript actually gets closer to full cross-browser support in this area still.
But again, the main point of this tutorial is to kinda walk through the steps of how you would integrate ANY JavaScript technique you found around the web. This is just a convenient example with tangible steps.
-
-
Is there a plugin (oh, of course there is, it’s just matter of finding it!) that enable us to include css or js for a specific page or post? Using conditional comments is not ideal: think we want a blog that have demos right in the middle of content (Smashing Magazine has!)…
-
Chris Coyier Post Author
Google for the “art direction” plugin. One of my all-time-favorites that allows you to do just that.
-
Thanks! It’s very useful.
-
-
-
Of course we could do that but only a few browsers support CSS animation. I’m thinking that we should use -webkit-transition and -moz-transition, in case if someone is browsing using this particular browsers and have js disabled.
I’m curious, if we use both (js and css animation) then do the animations have some sort of conflict?
-
 Giacomo Ratta [ITA]
I haven’t ever think this techinque.
Great solution and very beautiful animation! -
 Michael Oeser
Here is something similar without JS.
-
This is just great, I do have one question. Is it possible to give every button a different current class? I want every button, when it’s active, to be another color.
-
Chris Coyier Post Author
Because of the
wp_list_pagesfunction, each list item will have a unique class as well. Firebug over them to find it.
-
-
 Shibi Kannan
Really cool technique. I do agree about the CSS fallback part in case javascript is not working. We can actually use CSS3 using Safari or FF3 specific stylesheets for progressive enhancements and only include them when required using conditional statements. That way we can miniimize any conflict with jQuery and CSS3 trying to do the same things to the same object. But I suppose CSS3 will take precendece before the jQuery will not load until the DOM is ready. What is your opinion.
-
 Hassan
Chris, what is your recommendation wp plugin to have contact form?
-
Hassan
I was thinking, it’s good to make a new post about what is your favorites wp plugins… which you use most…
-
I’m still using the free wordpress, lol, but nice post. I just finished learning css, so this was a great filler to update my blogging-design skills. Shibi seems to know a pretty darn lot, lol, good stuff man. I agree with Javascript failure on certain browsers, but in a few months I think most will be upgraded & stable, such as chrome, i’m on it right now & its my favorite. I wanted to know tho, is there a way to make this more web 2.0-ish, such as make half of the button light up with a white opacity, or even a shiny inset border on a tiny button or icon. I’m tuning up my flash tricks after years of hating how it wasn’t compatible on all browsers, but it’s making a great comeback. I have used css/html tricks innovatively as that was all I knew, lol. I will be back to check on more tutorials and see the feedback. Great post! Im on my nerd journey, watch out!